
Augmented Reality (AR) is a technology that overlays digital content onto the real world. It creates an immersive experience that allows users to interact with virtual objects in the real world. Apple’s iPhone is one of the most popular devices for AR, and it has a range of features that make it easy to use AR on the device. In this blog post, I will share with you a step by step guide of how to use ar on iphone to make process easier for you.
Getting started with AR on an iPhone is simple. First, users need to ensure that their iPhone is compatible with AR technology. iPhones from the iPhone 6S and later have the necessary components for AR functionality. Users need to update their iOS to the latest version to ensure that they have access to the latest AR features.
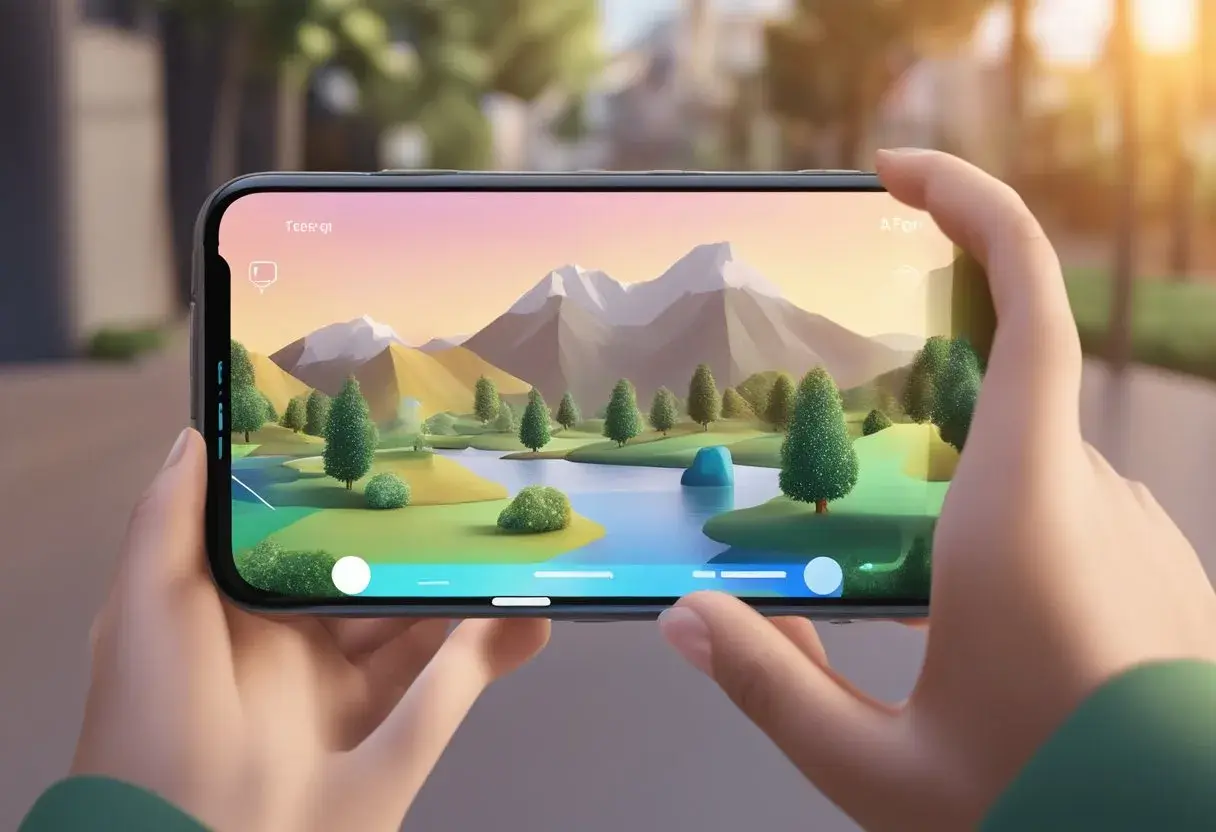
Once the iPhone is ready, users can explore AR apps on the App Store. There are a variety of AR apps available, including games, educational apps, and design tools. Users can also create their own AR experiences using ARKit, Apple’s AR development platform. With ARKit, users can create their own virtual objects and place them in the real world.
Key Takeaways
- AR is a technology that overlays digital content onto the real world.
- iPhones from the iPhone 6S and later have the necessary components for AR functionality.
- Users can explore AR apps on the App Store and create their own AR experiences using ARKit.
Getting Started with AR on iPhone
Augmented Reality (AR) is a technology that overlays digital information onto the real world, using apps on smartphones and other devices. Simply put, AR lets you see digital images and information superimposed on the physical world. AR is a great way to bring digital content to life, and it has a wide range of applications, from gaming to education, to healthcare.
AR on iPhone is powered by Apple’s ARKit, a software development kit that enables developers to create AR apps for iOS devices. ARKit uses the device’s camera and sensors to track the user’s surroundings and place digital objects in the real world. ARKit is available on iOS devices running iOS 11 or later, and it requires a device with an A9 or later processor and at least 2GB of RAM.
Compatibility and System Requirements
Before getting started with AR on iPhone, it’s important to ensure that your device is compatible with AR technology. AR requires specific hardware capabilities, so check if your iPhone model supports AR. Generally, iPhones from the iPhone 6S and later have the necessary components for AR functionality.
To check if your iPhone is compatible with AR, go to Settings > General > About > Applications > ARKit. If you see a “Yes” next to “ARKit”, your device is compatible with AR. If you don’t see “ARKit” listed, your device is not compatible with AR.
In addition to hardware compatibility, you’ll also need to make sure that your device is running the latest version of iOS. To update your device to the latest version of iOS, go to Settings > General > Software Update. If an update is available, tap “Download and Install” to update your device.
Getting started with AR on iPhone is easy and straightforward. By understanding the capabilities of AR and ensuring that your device is compatible with AR technology and running the latest version of iOS, you can start exploring the exciting world of AR on your iPhone.
How to use AR on iPhone

Using augmented reality (AR) on an iPhone involves leveraging AR apps that are either pre-installed or available on the App Store. Here’s a comprehensive step-by-step guide to using AR on your iPhone:
- Check Device Compatibility: Ensure your iPhone supports AR. Most iPhones with A9 chips and later (iPhone 6s and beyond) support ARKit, Apple’s AR platform.
- Update iOS: Make sure your iPhone is running the latest version of iOS to have the most recent AR features.
- Explore Pre-installed AR Apps: Some iPhones come with pre-installed apps that use AR, like the Measure app. Open it to turn your iPhone into a tape measure using AR technology.
- Find AR Apps on the App Store: Open the App Store and search for AR apps. Look for apps with good reviews that suit your interests, such as games, education, design, or shopping.
- Download and Install AR Apps: Choose an app and tap ‘Get’ or the download button to install it on your iPhone.
- Grant Permissions: When you first open an AR app, it may ask for permissions like camera or location access. Grant the necessary permissions for the app to function correctly.
- Follow App Instructions: Each AR app will have its own set of instructions. Follow the on-screen prompts to learn how to use the app’s specific AR features.
- Scan Your Environment: Many AR apps will require you to scan your surroundings to anchor virtual objects. Move your iPhone around as directed by the app until it recognizes the space.
- Interact with the AR Elements: Engage with the AR content by following the app’s interactive elements, which may include touching the screen, moving your device, or walking around physical space.
- Customize Your Experience: Some apps allow you to interact with the AR environment in various ways, such as placing furniture in a room or trying on virtual makeup.
- Capture or Record Your Experience: Use your iPhone’s screenshot or screen recording features to capture your AR experience, if the app doesn’t offer a built-in photo or video feature.
- Close the App Properly: When done, close the AR app to save battery and processing power, as AR can be resource-intensive.
- Stay Safe: Always remain aware of your surroundings when using AR to avoid accidents.
Exploring AR Apps on the App Store
Augmented Reality (AR) apps have become increasingly popular among iPhone users. The App Store has a wide range of AR apps that users can download and explore. In this section, we will look at some popular AR apps for iPhone and how they can be used for educational purposes.
Popular AR Apps for iPhone
One of the most popular AR apps on the App Store is Pokemon Go. This game allows users to catch virtual Pokemon that appear in the real world. Another popular AR app is IKEA Place, which allows users to preview furniture in their homes before making a purchase.
In addition to games and shopping apps, there are also many educational AR apps available on the App Store. For example, the ARKit app allows users to create their own AR experiences, while the Anatomy 4D app allows users to explore the human body in 3D.
Educational Uses of AR Apps
AR apps can be a great tool for education. For example, the Civilisations AR app allows users to explore ancient artifacts in 3D, while the Star Walk 2 app allows users to explore the stars and planets in the night sky.
AR apps can also be used to enhance classroom learning. Teachers can use AR apps to bring virtual objects into the classroom, allowing students to explore and interact with them. This can be especially useful for subjects such as science and history.
There are many AR apps available on the App Store for iPhone users to explore. These apps can be used for entertainment, shopping, and education. With the wide range of AR apps available, there is something for everyone.
Creating AR Experiences with ARKit
Augmented Reality (AR) is a rapidly growing field that allows developers to create immersive and interactive experiences for users. With the ARKit framework, developers can easily create AR experiences for iPhone and iPad devices. In this section, we will discuss how to develop with ARKit, as well as integrating ARKit with RealityKit and Metal.
Developing with ARKit Framework
ARKit is a powerful framework that provides developers with the tools to create AR experiences on iOS devices. It uses scene understanding, computer vision, and machine learning to create accurate and realistic AR experiences. Developers can use ARKit to create AR experiences that include 3D models, animations, and interactive elements.
To get started with ARKit, developers need to create an Xcode project and import the ARKit framework. They can then use ARKit’s APIs to create AR experiences. ARKit provides APIs for camera tracking, plane detection, and hit testing, which allow developers to create realistic AR experiences. Developers can also use ARKit’s light estimation API to create realistic lighting in their AR scenes.
Integrating ARKit with RealityKit and Metal
RealityKit is a high-level framework that allows developers to create AR experiences with ease. It provides developers with pre-built 3D models, animations, and physics simulations, which can be easily integrated with ARKit. RealityKit also provides a drag-and-drop interface for creating AR experiences.
Developers can also use Metal to create custom shaders and rendering pipelines for their AR experiences. Metal is a low-level graphics API that provides developers with direct access to the GPU. This allows developers to create highly optimized AR experiences that run smoothly on iOS devices.
ARKit is a powerful framework that provides developers with the tools to create immersive and interactive AR experiences on iOS devices. Developers can use ARKit to create AR experiences that include 3D models, animations, and interactive elements. They can also integrate ARKit with RealityKit and Metal to create highly optimized AR experiences.
Enhancing AR with Advanced iPhone Features
Utilizing the Lidar Scanner
The iPhone 12 Pro and Pro Max are equipped with a Lidar scanner that offers advanced depth-sensing capabilities. This technology enables AR apps to accurately measure distances, detect surfaces, and create 3D maps of the surrounding environment. By leveraging the Lidar scanner, AR experiences on the iPhone can be more immersive and realistic.
The Lidar scanner also allows for object occlusion, which means that virtual objects can be placed behind real-world objects, creating a more convincing AR experience. This feature is especially useful for gaming and educational apps, where users can interact with virtual objects in a more natural way.
Leveraging iPhone Cameras for AR
The iPhone’s cameras are also an essential component for AR experiences. The cameras capture images and videos of the real world, which are then used by AR apps to overlay virtual objects on top of the scene. The iPhone’s cameras are capable of capturing high-quality images and videos, which are essential for creating convincing AR experiences.
AR apps can also use the iPhone’s cameras to track the user’s movements, which allows virtual objects to be anchored to a specific point in space. This feature is useful for creating interactive AR experiences, where users can move around and explore virtual objects from different angles.
The iPhone’s advanced features, such as the Lidar scanner and high-quality cameras, are essential for creating immersive and realistic AR experiences. By leveraging these features, app developers can create AR apps that are both entertaining and educational, providing users with a new way to interact with the world around them.
Interacting with Virtual Objects in AR
In AR, users can interact with virtual objects as if they were real. This is made possible by rendering the virtual objects in 3D graphics and overlaying them onto the real world. Interacting with virtual objects in AR can be done in various ways, depending on the application.
Placing and Moving Virtual Furniture
One of the most popular applications of AR is in the field of interior design. Users can use AR to visualize how furniture would look in their home before making a purchase. By using an AR app, users can place virtual furniture in their home and move it around to see how it would look in different locations. This is made possible by using the camera on the iPhone to capture the real-world environment and overlaying the virtual furniture on top of it.
Games and Entertainment in AR
AR can also be used for gaming and entertainment. Popular games like Pokemon Go and Zombies, Run! use AR to create immersive experiences for users. In Pokemon Go, users can catch virtual Pokemon in the real world by using their iPhone camera to capture the environment and overlaying the virtual Pokemon on top of it. In Zombies, Run!, users can run from virtual zombies that are overlaid onto the real world.
AR allows users to interact with virtual objects in the real world. By rendering virtual objects in 3D graphics and overlaying them onto the real world, users can visualize how they would look in their environment. This technology has applications in various fields, including interior design and gaming.
Frequently Asked Questions
What steps are involved in activating AR mode on an iPhone camera?
To activate AR mode on an iPhone camera, you need to first ensure that your iPhone is compatible with AR technology. iPhones from iPhone 6S and later models have the necessary components for AR functionality. Next, update your iOS to the latest version. Once you have done that, you can download an app that offers AR features or use Apple’s built-in AR apps. To activate AR mode on the camera, open the app and select the AR mode option. Point the camera at the object you want to view in AR, and you should see the object overlaid with digital information.
How can you engage with AR content using Apple’s AR apps?
Apple’s AR apps, such as Measure and Clips, allow users to engage with AR content in a variety of ways. Measure allows users to measure objects in the real world using AR technology. Clips allows users to add AR effects to their videos, such as animated stickers and text. To engage with AR content using these apps, simply open the app and select the AR feature you want to use. Follow the on-screen instructions to use the feature.
What are the capabilities of the iPhone 13 Pro’s AR view feature?
The iPhone 13 Pro’s AR view feature allows users to view objects in augmented reality. This feature uses LiDAR technology to create a 3D map of the user’s surroundings, allowing for more accurate AR experiences. With the AR view feature, users can view objects in 3D, measure distances, and more.
Can you explain the process of using the AR video lab on an iPhone?
The AR video lab is a feature in Apple’s Clips app that allows users to create AR videos. To use the AR video lab, open the Clips app and select the AR video lab option. Follow the on-screen instructions to select the AR effects you want to use and record your video. Once you have recorded your video, you can edit it using the app’s editing tools.
How do Apple AR glasses integrate with the iPhone experience?
Apple AR glasses are designed to integrate seamlessly with the iPhone experience. The glasses will likely use the iPhone’s processing power and sensors to create AR experiences. Users will be able to control the glasses using their iPhone, and the glasses will be able to display information from the iPhone, such as notifications and messages.
What is the pricing model for Apple’s AR applications and features?
Apple’s AR applications and features are typically included with the purchase of an iPhone or iPad. Some third-party AR apps may have a cost associated with them. However, Apple does not charge for the use of its built-in AR apps or features.